Content
I've made a lot of baked wings in my life, and I've had my share of disappointments—pale, rubbery skin, wings that stuck to the foil like they were glued there, seasoning that slid right off in the oven. Two things fixed all of that.
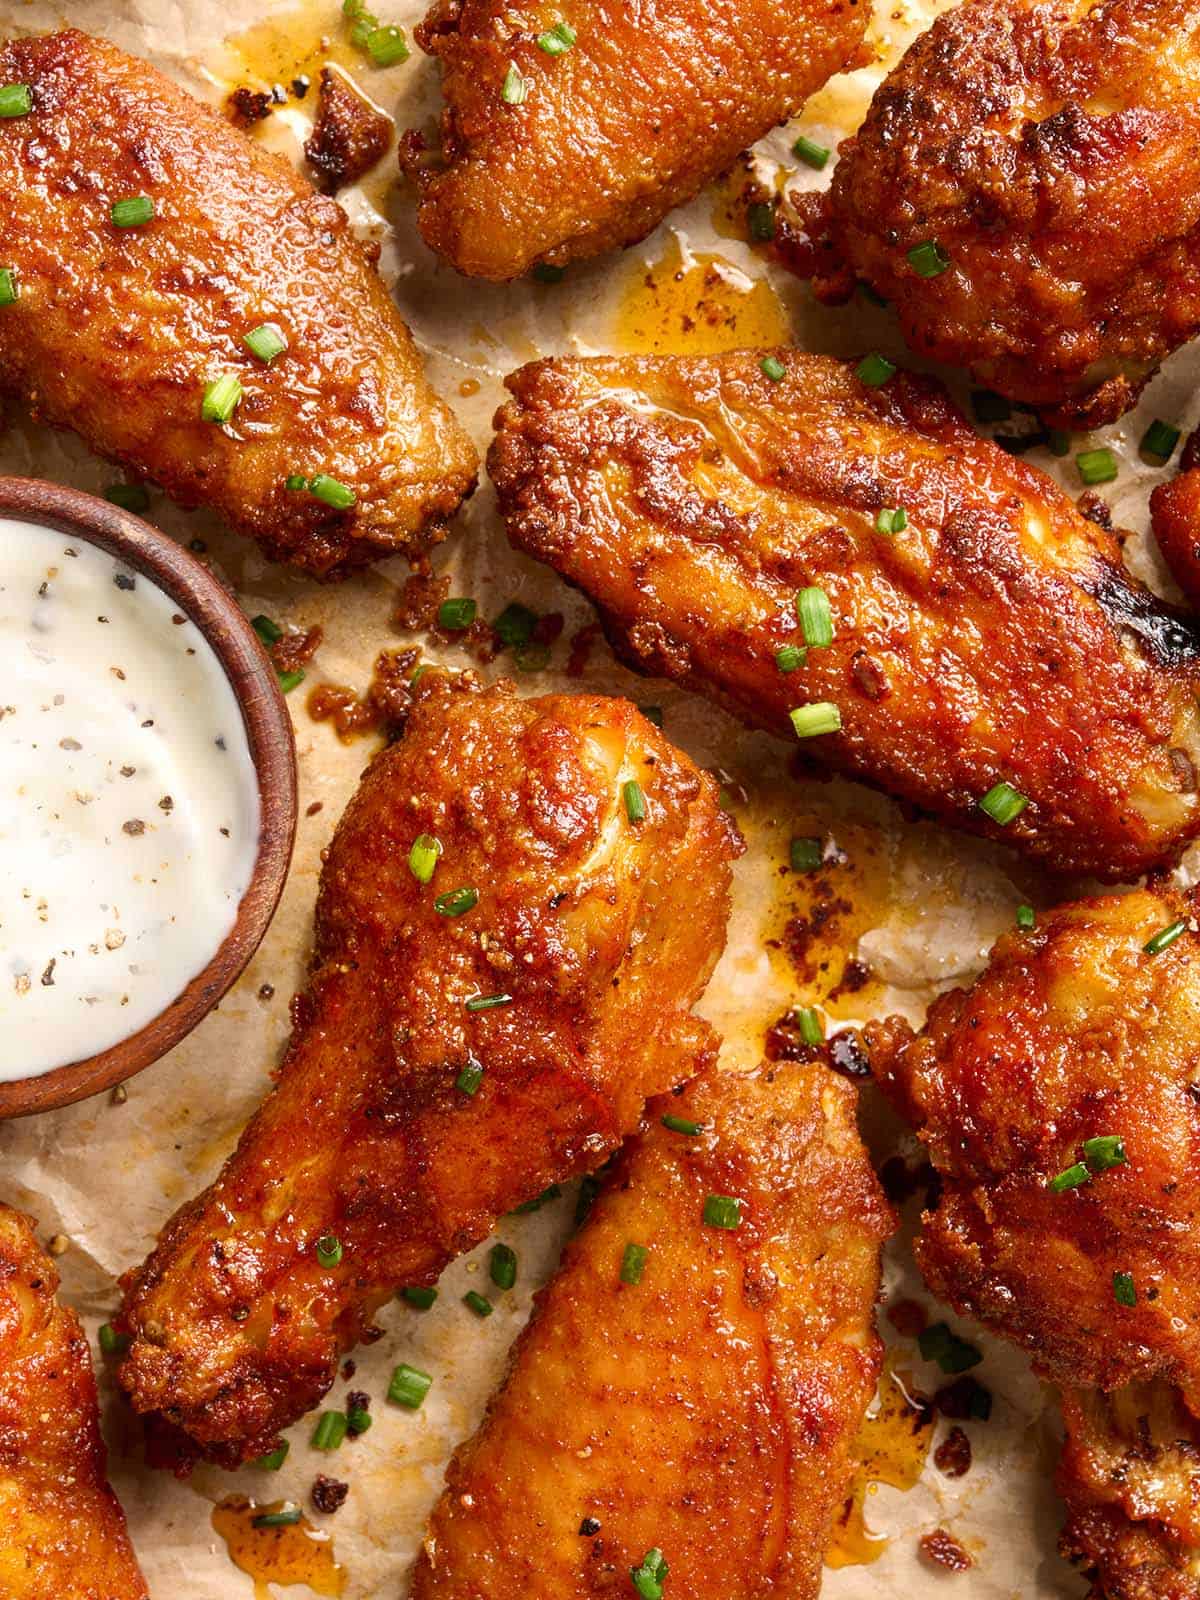
First, I coat the wings in flour. Not a heavy batter, just a thin, seasoned dusting that builds texture. That flour is what turns into a crisp, golden crust instead of a soft, flabby surface. It also gives the paprika and garlic powder something to cling to, so the flavor stays put instead of falling to the bottom of the pan.
Second, I bake them on a tray dotted with butter. Small pieces of cold butter scattered around the wings melt as they roast, basting the chicken in rich, golden fat that helps the skin brown and crisp instead of drying out. It's a small step that makes a big difference. And if you've ever had wings weld themselves to the foil, a generous coat of nonstick spray under the butter solves that problem completely. I learned that one the hard way, scraping sad, torn wings off a baking sheet while my family waited at the table.
What You Actually Need
Chicken wings. I reach for wingettes—the flat, middle section of the wing—because they crisp up more evenly and are easier to eat, especially when you're feeding a crowd. Drumettes work too and taste just as good, but they're thicker, so they need a couple extra minutes in the oven. Whole wings, with the drumette and wingette still connected, are the least convenient to eat but absolutely work if that's what you've got. Buy by weight if you can, not by count. Wing size varies wildly from package to package, and size is the single biggest factor in how long they need to bake.
Flour and seasoning. Plain all-purpose flour is the backbone of that crispy crust. It helps the paprika and garlic powder stick and turns golden as it bakes. Use regular sweet paprika here—not hot, not smoked. The amount in this recipe is built around sweet paprika's mild, warm flavor, and swapping it will change the taste and heat level more than you'd expect.
Butter. Three tablespoons, cut into small pieces and dotted around the baking sheet. As they melt, they baste the wings, adding richness and helping the skin crisp and brown. And a quick note: even with the butter, wings can stick to foil. A generous coat of nonstick cooking spray underneath solves it. I've added this to the ingredient list and the first step for exactly that reason.
Why This Dry Rub Works
This seasoning blend looks simple, but every ingredient is doing a job. Paprika adds warm, slightly smoky-sweet flavor and gives the wings that deep golden-red color. Garlic powder gives them savory depth without overpowering the other flavors. Salt enhances the chicken's natural flavor—I increased this from my original amount after testing, because the wings needed it. And flour is what turns this seasoning into a crisp, coated crust instead of just a dusting that falls off in the oven.
How to Bake Chicken Wings That Actually Crisp
Prep the pan. Preheat your oven to 425°F. Line a baking sheet with foil, spray it generously with nonstick cooking spray, then dot with the 3 tablespoons of butter. No need to melt it first, though you can if you'd like. The spray is what keeps the wings from bonding to the foil once the butter starts to brown.
Mix the seasoned flour. In a medium bowl, whisk together ⅓ cup flour, 2 tablespoons paprika, 1 teaspoon garlic powder, 2 teaspoons kosher salt, and 1 teaspoon black pepper until evenly combined.
Pat the wings dry. Use paper towels to pat the wings dry before coating them. This matters more than it looks like it would. Extra moisture on the surface keeps the flour from sticking well and can leave you with a soggy coating instead of a crisp one, especially if your wings were frozen.
Coat the wings. Add the wings to the bowl and toss with your hands until every wing is fully coated in the flour mixture, front and back. The coating should look thick and a little clumpy, and that's what turns into a crisp, golden crust in the oven.
Arrange the baking sheet. Arrange the wings on the prepared baking sheet, tucking the butter pieces evenly between them so every wing gets some as it melts.
First bake. Bake for 30 minutes. The wings will look pale gold, and the butter should be fully melted and bubbling around them.
Flip and finish. Flip each wing and bake for another 15 minutes, until the skin is deep golden brown and crisp, and the wings are cooked through (165°F on an instant-read thermometer). Total bake time is 45 minutes. Don't skip the flip, or the underside won't crisp.
Serve. Plate the wings with your favorite dipping sauce and a sprinkle of fresh parsley, if you like.
Becky's Tips for Perfect Wings Every Time
Total bake time is 45 minutes—30 minutes, then 15 more after flipping. Since wing size varies, check for doneness by color and internal temperature rather than the timer alone. This timing is based on wings thawed from frozen, weighing about 1.5 pounds for 10–12 wingettes. Smaller or fresh wings can dry out at the full 45 minutes, so start checking a few minutes early if yours look small. No baking powder is needed—the flour coating and hot oven already give you crispy skin. Adding ½ teaspoon to the flour mixture is fine if you want an even drier finish, but it's optional. And remember: this recipe is built around regular sweet paprika. Hot or smoked paprika will change the taste and the heat level.
What to Serve With Crispy Baked Chicken Wings
I make these wings for game day more than anything else, but they come together fast enough for a regular weeknight, too. They're one of my go-to picks for the Super Bowl, Father's Day cookouts, and 4th of July spreads, and they hold up well on a potluck table since they're just as good at room temperature as they are fresh from the oven.
Dipping sauces. You can have fun switching up the sauce on these wings. Buffalo sauce brings real heat and tang, and it's the classic pairing if you want these wings to taste like traditional game-day wings. Ranch dressing is cool and creamy, and it mellows out the spice from the paprika rather than adding any of its own. Chick-fil-A sauce is sweet and tangy with barely any heat, and it's my pick when I want something kid-friendly.
What to serve alongside. For a classic game-day spread, I like to serve these with crispy homemade french fries or potato wedges. They're perfect for catching the extra dipping sauce. If I'm going for a full dinner, creamy coleslaw or mac and cheese casserole rounds things out nicely, since both are cool, rich contrasts to the crispy, savory wings. For a lighter option, veggie sticks alongside the same dips work well if you want to keep the meal from feeling too heavy.
Flavor Variations to Try
Spicier wings. Add ½ to 1 teaspoon of cayenne pepper or chili powder to the flour mixture for extra heat without changing the method at all.
Ranch-seasoned wings. Swap the garlic powder, salt, and pepper for a packet of dry ranch seasoning mix, whisked into the flour, for a completely different flavor with the same crispy texture.
Honey-drizzled wings. Finish the baked wings with a light drizzle of honey right before serving for a sweet-savory combination.
Extra-garlicky wings. Double the garlic powder if you're a garlic lover. It won't throw off the texture, just the flavor intensity.
How to Make Crispy Baked Chicken Wings in the Air Fryer
Gather and prepare all ingredients and preheat the air fryer at 400°F. In a medium-sized bowl, combine the flour, paprika, garlic powder, salt, and pepper. Toss the wings in the flour mixture, coating both sides of each wing fully. Coat the air fryer basket with nonstick spray. Arrange the breaded wings in a single layer, leaving space between each wing so they don't touch. Work in batches if needed. Spray the tops of the wingettes with nonstick spray. Cook the wings for about 20 minutes, flipping halfway through and spraying the wings with additional nonstick spray after flipping. Make sure they reach an internal temperature of at least 165°F, or, for the best texture, 175°F–185°F.
How to Store and Reheat
Store cooled wings in an airtight container for up to 3 days. To freeze, arrange them in a single layer on a baking sheet until solid, then transfer to a freezer bag for up to 3 months. Thaw overnight in the refrigerator before reheating. Reheat in a 350°F oven for about 15 minutes, or until the internal temperature reaches 165°F. This keeps the skin crispier than microwaving.
More Chicken Wing Recipes to Try
Buffalo Wings. When only classic buffalo will do, this recipe skips the dry rub and goes straight for that tangy, spicy sauce everyone expects at a game-day spread.
Grilled Chicken Wings. This is the version to make once the weather warms up and the grill is going, and it gets you that same crispy skin with a smoky char instead of an oven finish.
Honey-Glazed Chicken Wings. These wings get finished in a sticky honey glaze instead of a dry rub, so it's a good pick if you want something sweeter for wing night but still easy for a crowd.
Hot Honey Chicken Wings. If you love the flavor of this dry rub but want more heat, this recipe layers sweet and spicy together and gives you the best of both.
First, I coat the wings in flour. Not a heavy batter, just a thin, seasoned dusting that builds texture. That flour is what turns into a crisp, golden crust instead of a soft, flabby surface. It also gives the paprika and garlic powder something to cling to, so the flavor stays put instead of falling to the bottom of the pan.
Second, I bake them on a tray dotted with butter. Small pieces of cold butter scattered around the wings melt as they roast, basting the chicken in rich, golden fat that helps the skin brown and crisp instead of drying out. It's a small step that makes a big difference. And if you've ever had wings weld themselves to the foil, a generous coat of nonstick spray under the butter solves that problem completely. I learned that one the hard way, scraping sad, torn wings off a baking sheet while my family waited at the table.
What You Actually Need
Chicken wings. I reach for wingettes—the flat, middle section of the wing—because they crisp up more evenly and are easier to eat, especially when you're feeding a crowd. Drumettes work too and taste just as good, but they're thicker, so they need a couple extra minutes in the oven. Whole wings, with the drumette and wingette still connected, are the least convenient to eat but absolutely work if that's what you've got. Buy by weight if you can, not by count. Wing size varies wildly from package to package, and size is the single biggest factor in how long they need to bake.
Flour and seasoning. Plain all-purpose flour is the backbone of that crispy crust. It helps the paprika and garlic powder stick and turns golden as it bakes. Use regular sweet paprika here—not hot, not smoked. The amount in this recipe is built around sweet paprika's mild, warm flavor, and swapping it will change the taste and heat level more than you'd expect.
Butter. Three tablespoons, cut into small pieces and dotted around the baking sheet. As they melt, they baste the wings, adding richness and helping the skin crisp and brown. And a quick note: even with the butter, wings can stick to foil. A generous coat of nonstick cooking spray underneath solves it. I've added this to the ingredient list and the first step for exactly that reason.
Why This Dry Rub Works
This seasoning blend looks simple, but every ingredient is doing a job. Paprika adds warm, slightly smoky-sweet flavor and gives the wings that deep golden-red color. Garlic powder gives them savory depth without overpowering the other flavors. Salt enhances the chicken's natural flavor—I increased this from my original amount after testing, because the wings needed it. And flour is what turns this seasoning into a crisp, coated crust instead of just a dusting that falls off in the oven.
How to Bake Chicken Wings That Actually Crisp
Prep the pan. Preheat your oven to 425°F. Line a baking sheet with foil, spray it generously with nonstick cooking spray, then dot with the 3 tablespoons of butter. No need to melt it first, though you can if you'd like. The spray is what keeps the wings from bonding to the foil once the butter starts to brown.
Mix the seasoned flour. In a medium bowl, whisk together ⅓ cup flour, 2 tablespoons paprika, 1 teaspoon garlic powder, 2 teaspoons kosher salt, and 1 teaspoon black pepper until evenly combined.
Pat the wings dry. Use paper towels to pat the wings dry before coating them. This matters more than it looks like it would. Extra moisture on the surface keeps the flour from sticking well and can leave you with a soggy coating instead of a crisp one, especially if your wings were frozen.
Coat the wings. Add the wings to the bowl and toss with your hands until every wing is fully coated in the flour mixture, front and back. The coating should look thick and a little clumpy, and that's what turns into a crisp, golden crust in the oven.
Arrange the baking sheet. Arrange the wings on the prepared baking sheet, tucking the butter pieces evenly between them so every wing gets some as it melts.
First bake. Bake for 30 minutes. The wings will look pale gold, and the butter should be fully melted and bubbling around them.
Flip and finish. Flip each wing and bake for another 15 minutes, until the skin is deep golden brown and crisp, and the wings are cooked through (165°F on an instant-read thermometer). Total bake time is 45 minutes. Don't skip the flip, or the underside won't crisp.
Serve. Plate the wings with your favorite dipping sauce and a sprinkle of fresh parsley, if you like.
Becky's Tips for Perfect Wings Every Time
Total bake time is 45 minutes—30 minutes, then 15 more after flipping. Since wing size varies, check for doneness by color and internal temperature rather than the timer alone. This timing is based on wings thawed from frozen, weighing about 1.5 pounds for 10–12 wingettes. Smaller or fresh wings can dry out at the full 45 minutes, so start checking a few minutes early if yours look small. No baking powder is needed—the flour coating and hot oven already give you crispy skin. Adding ½ teaspoon to the flour mixture is fine if you want an even drier finish, but it's optional. And remember: this recipe is built around regular sweet paprika. Hot or smoked paprika will change the taste and the heat level.
What to Serve With Crispy Baked Chicken Wings
I make these wings for game day more than anything else, but they come together fast enough for a regular weeknight, too. They're one of my go-to picks for the Super Bowl, Father's Day cookouts, and 4th of July spreads, and they hold up well on a potluck table since they're just as good at room temperature as they are fresh from the oven.
Dipping sauces. You can have fun switching up the sauce on these wings. Buffalo sauce brings real heat and tang, and it's the classic pairing if you want these wings to taste like traditional game-day wings. Ranch dressing is cool and creamy, and it mellows out the spice from the paprika rather than adding any of its own. Chick-fil-A sauce is sweet and tangy with barely any heat, and it's my pick when I want something kid-friendly.
What to serve alongside. For a classic game-day spread, I like to serve these with crispy homemade french fries or potato wedges. They're perfect for catching the extra dipping sauce. If I'm going for a full dinner, creamy coleslaw or mac and cheese casserole rounds things out nicely, since both are cool, rich contrasts to the crispy, savory wings. For a lighter option, veggie sticks alongside the same dips work well if you want to keep the meal from feeling too heavy.
Flavor Variations to Try
Spicier wings. Add ½ to 1 teaspoon of cayenne pepper or chili powder to the flour mixture for extra heat without changing the method at all.
Ranch-seasoned wings. Swap the garlic powder, salt, and pepper for a packet of dry ranch seasoning mix, whisked into the flour, for a completely different flavor with the same crispy texture.
Honey-drizzled wings. Finish the baked wings with a light drizzle of honey right before serving for a sweet-savory combination.
Extra-garlicky wings. Double the garlic powder if you're a garlic lover. It won't throw off the texture, just the flavor intensity.
How to Make Crispy Baked Chicken Wings in the Air Fryer
Gather and prepare all ingredients and preheat the air fryer at 400°F. In a medium-sized bowl, combine the flour, paprika, garlic powder, salt, and pepper. Toss the wings in the flour mixture, coating both sides of each wing fully. Coat the air fryer basket with nonstick spray. Arrange the breaded wings in a single layer, leaving space between each wing so they don't touch. Work in batches if needed. Spray the tops of the wingettes with nonstick spray. Cook the wings for about 20 minutes, flipping halfway through and spraying the wings with additional nonstick spray after flipping. Make sure they reach an internal temperature of at least 165°F, or, for the best texture, 175°F–185°F.
How to Store and Reheat
Store cooled wings in an airtight container for up to 3 days. To freeze, arrange them in a single layer on a baking sheet until solid, then transfer to a freezer bag for up to 3 months. Thaw overnight in the refrigerator before reheating. Reheat in a 350°F oven for about 15 minutes, or until the internal temperature reaches 165°F. This keeps the skin crispier than microwaving.
More Chicken Wing Recipes to Try
Buffalo Wings. When only classic buffalo will do, this recipe skips the dry rub and goes straight for that tangy, spicy sauce everyone expects at a game-day spread.
Grilled Chicken Wings. This is the version to make once the weather warms up and the grill is going, and it gets you that same crispy skin with a smoky char instead of an oven finish.
Honey-Glazed Chicken Wings. These wings get finished in a sticky honey glaze instead of a dry rub, so it's a good pick if you want something sweeter for wing night but still easy for a crowd.
Hot Honey Chicken Wings. If you love the flavor of this dry rub but want more heat, this recipe layers sweet and spicy together and gives you the best of both.